|
|
汽车零部件采购、销售通信录 填写你的培训需求,我们帮你找 招募汽车专业培训老师
新年到了,除了打扫卫生之外,小编把家里的老年机也重做了系统,顺带着安装软件的功夫配置了下常用语言的调试环境。
1.1 下载、安装python
Python的官网:Welcome to Python.org,目前最新的版本号已经到了3.12,安装的话比较简单,一路next即可,注意添加 exe到 Path中。
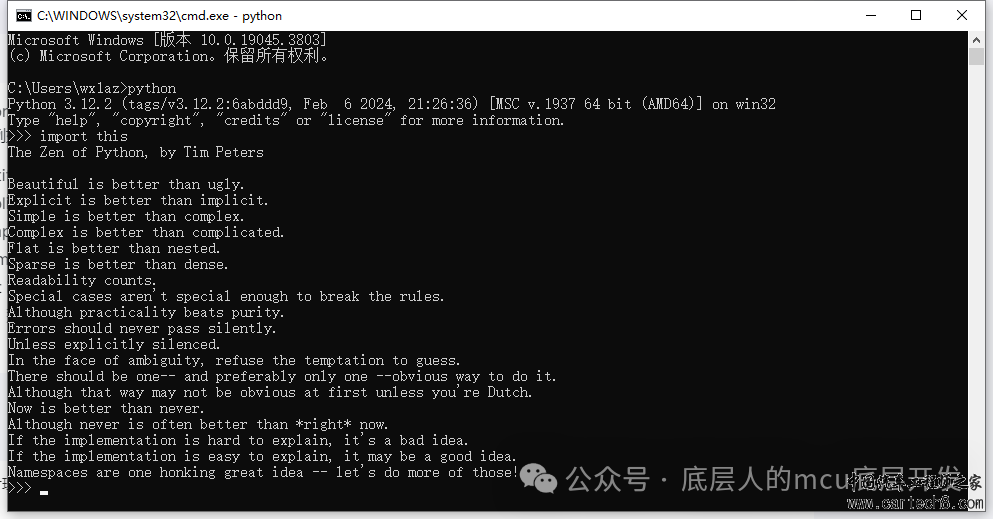
安装完成后简单验证一下,可以在cmd中敲出python,之后import this,就会显示python之禅了。
1.2 VScode环境配置
需要在vscode软件中安装python的扩展插件,


之后我们新建文件,敲完代码之后直接双击F5即可。

或者在终端中使用命令行也可。


2. C语言调试环境
2.1 安装winGW64
下载地址:MinGW-w64 - for 32 and 64 bit Windows - Browse /mingw-w64 at SourceForge.net
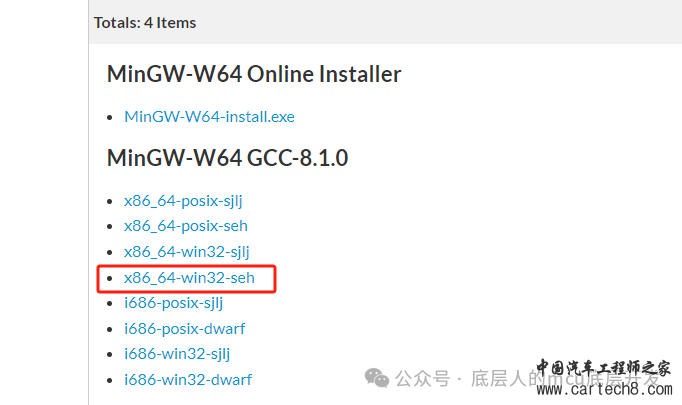
下载之后解压。
2.2 修改环境变量
需要将解压后文件的地址放入环境变量中。
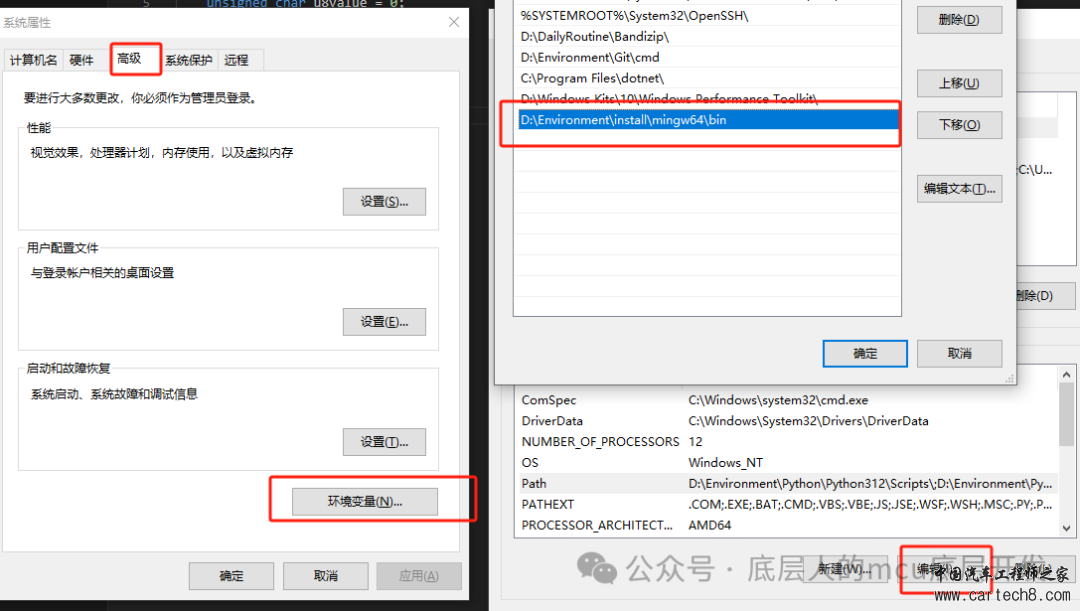
之后还是常规的cmd测试。
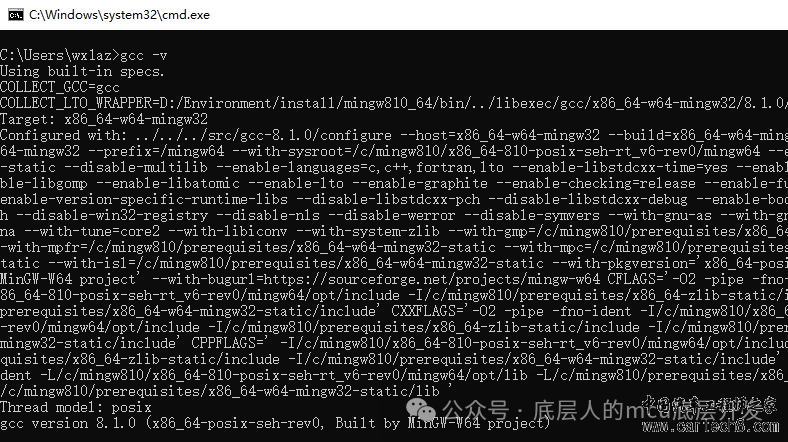
2.3 配置VSCODE
首先还是安装插件。


之后需要手动建.vscode文件夹,并添加文件以下文件,需要将路径相关修改为之前minGW的解压路径。
c_cpp_properties.json
{"configurations": [ {"name": "Win32","includePath": ["${workspaceRoot}","D:/Environment/install/mingw810_64/include/**","D:/Environment/install/mingw810_64/bin/../lib/gcc/x86_64-w64-mingw32/8.1.0/include/c++","D:/Environment/install/mingw810_64/bin/../lib/gcc/x86_64-w64-mingw32/8.1.0/include/c++/x86_64-w64-mingw32","D:/Environment/install/mingw810_64/bin/../lib/gcc/x86_64-w64-mingw32/8.1.0/include/c++/backward","D:/Environment/install/mingw810_64/bin/../lib/gcc/x86_64-w64-mingw32/8.1.0/include","D:/Environment/install/mingw810_64/bin/../lib/gcc/x86_64-w64-mingw32/8.1.0/include-fixed","D:/Environment/install/mingw810_64/bin/../lib/gcc/x86_64-w64-mingw32/8.1.0/../../../../x86_64-w64-mingw32/include" ],"defines": ["_DEBUG","UNICODE","__GNUC__=6","__cdecl=__attribute__((__cdecl__))" ],"intelliSenseMode": "msvc-x64","browse": {"limitSymbolsToIncludedHeaders": true,"databaseFilename": "","path": ["${workspaceRoot}","D:/Environment/install/mingw810_64/include/**","D:/Environment/install/mingw810_64/bin/../lib/gcc/x86_64-w64-mingw32/8.1.0/include/c++","D:/Environment/install/mingw810_64/bin/../lib/gcc/x86_64-w64-mingw32/8.1.0/include/c++/x86_64-w64-mingw32","D:/Environment/install/mingw810_64/bin/../lib/gcc/x86_64-w64-mingw32/8.1.0/include/c++/backward","D:/Environment/install/mingw810_64/bin/../lib/gcc/x86_64-w64-mingw32/8.1.0/include","D:/Environment/install/mingw810_64/bin/../lib/gcc/x86_64-w64-mingw32/8.1.0/include-fixed","D:/Environment/install/mingw810_64/bin/../lib/gcc/x86_64-w64-mingw32/8.1.0/../../../../x86_64-w64-mingw32/include" ] } } ],"version": 4}
launch.json
{"version": "0.2.0","configurations": [ {"name": "g++.exe - 生成和调试活动文件","type": "cppdbg","request": "launch","program": "${fileDirname}\\${fileBasenameNoExtension}.exe","args": [],"stopAtEntry": false,"cwd": "${fileDirname}","environment": [],"externalConsole": false,"MIMode": "gdb","miDebuggerPath": "D:\\Environment\\install\\mingw810_64\\bin\\gdb.exe", //自己电脑中mingw64里面的gdb.exe文件路径"setupCommands": [ {"description": "为 gdb 启用整齐打印","text": "-enable-pretty-printing","ignoreFailures": true } ],"preLaunchTask": "C/C++: g++.exe build active file" } ]}
tasks.json
{"tasks": [ {"type": "cppbuild","label": "C/C++: g++.exe build active file","command": "D:\\Environment\\install\\mingw810_64\\bin\\g++.exe", //同理 找路径"args": ["-fdiagnostics-color=always","-g","${file}","-o","${fileDirname}\\${fileBasenameNoExtension}.exe" ],"options": {"cwd": "${fileDirname}" },"problemMatcher": ["$gcc" ],"group": {"kind": "build","isDefault": true },"detail": "调试器生成的任务。" } ],"version": "2.0.0"}
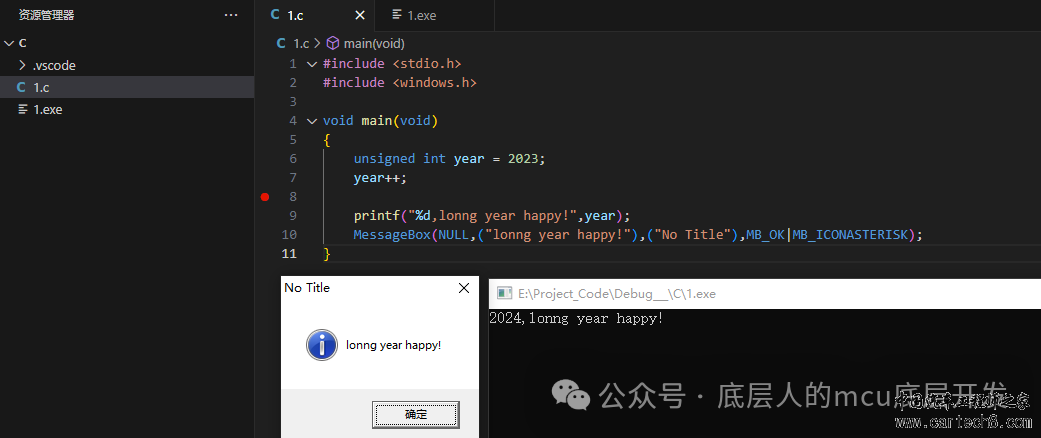
2.4 之后也是F5去断点调试即可。

当然,可是可以使用终端的命令来执行。

|
|
 |手机版|小黑屋|Archiver|汽车工程师之家
( 渝ICP备18012993号-1 )